Outlook Add-in
Using smartQ for Outlook
With smartQ for Outlook you can create tickets from Outlook emails with a few clicks!
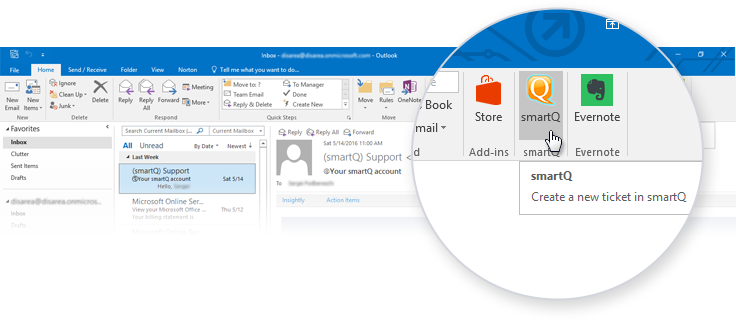
After you install the add-in (see instructions below), you will see smartQ button on Home Ribbon in desktop version of Outlook (Outlook 2016 shown below):
On web version of Outlook you will see "smartQ" link on the top of each email:

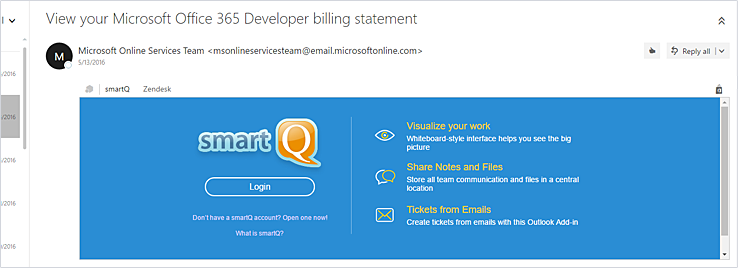
Select an email and open the add-in — you will see the login window:
After you login, select the project name from the list:
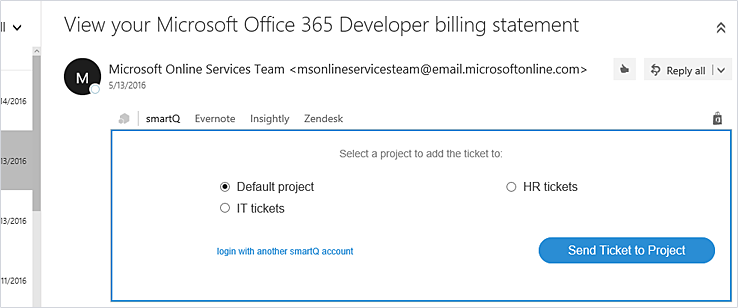
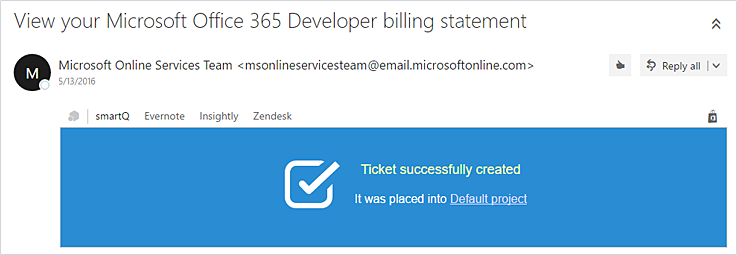
... then click "Send Ticket to Project" and the ticket will be created in your smartQ account. Email subject will become ticket's name, email body will become ticket's description and any attachments will be copied into the ticket as well:
Related blog post: Automating tickets creation from emails using email forwarding and filters.
Installing Outlook Add-in
Outlook add-ins are mini applications that extend Outlook functionality.
Depending on your version of Outlook, the add-ins are managed in different ways.
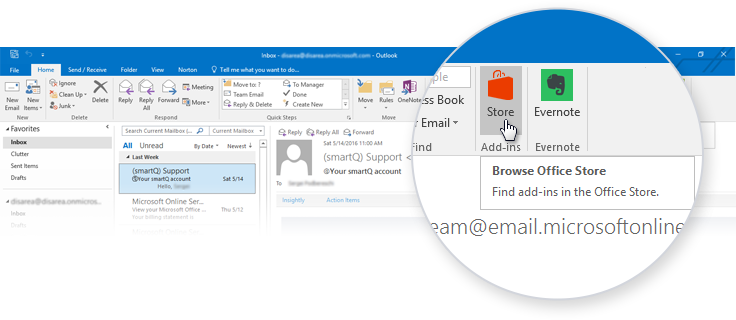
In Outlook 2016 you can install add-ins via "Store" button on the Outlook Home Ribbon:
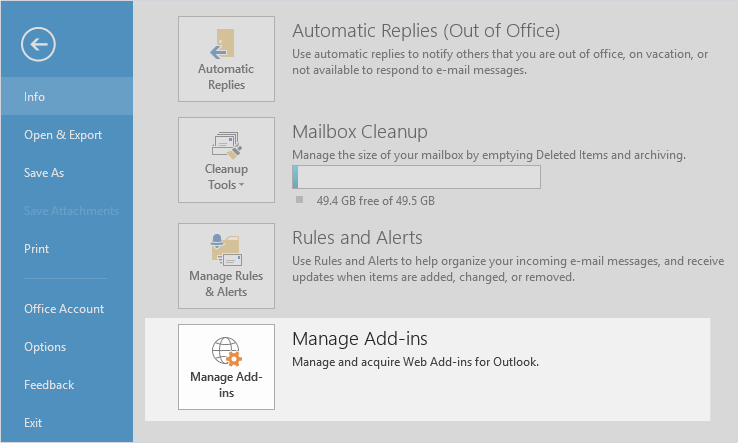
In Outlook 2013 you have to click "File" in the menu on the top, then "Manage add-ins", and you will see this screen:
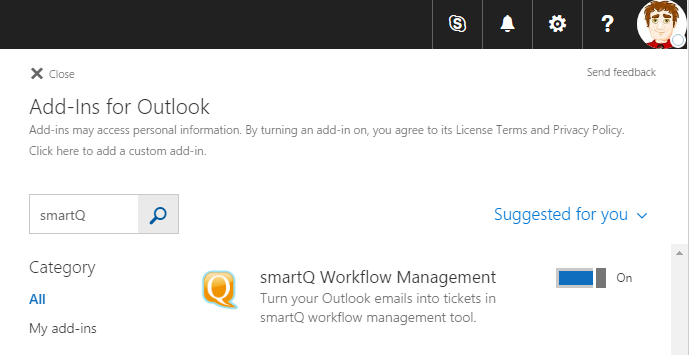
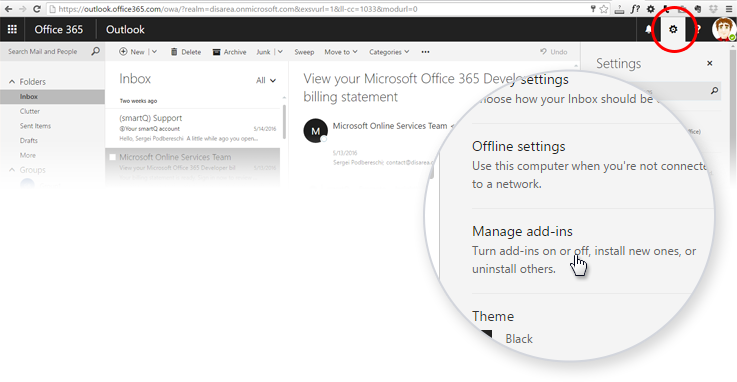
In web version of Outlook or Outlook.com you have to click the gear icon near the top right, then look for the "Manage add-ins" link:
Simply locate the add-in by its name — "smartQ" — and turn it on.