
Project Example 1: Task Management
"smartQ demo launch" project
This is an example of a web project - in this case the launch of a website. The tickets represent the tasks that have to be completed before the launch.
You can check this demo project here: https://demo.smartqweb.com/#board/67 .
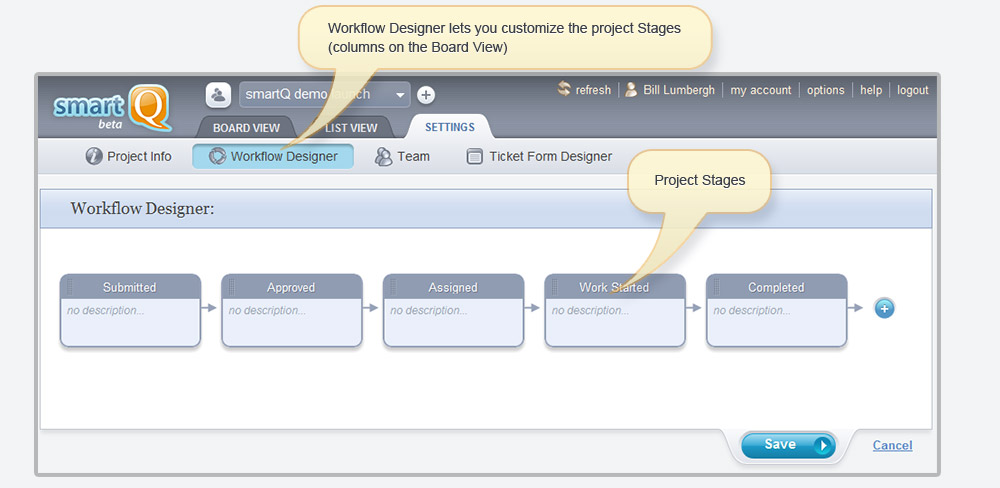
First, the project workflow is defined. In this case we decided the task-tickets will be going through five stages: Submitted, Approved, Assigned, Work Started and Completed.
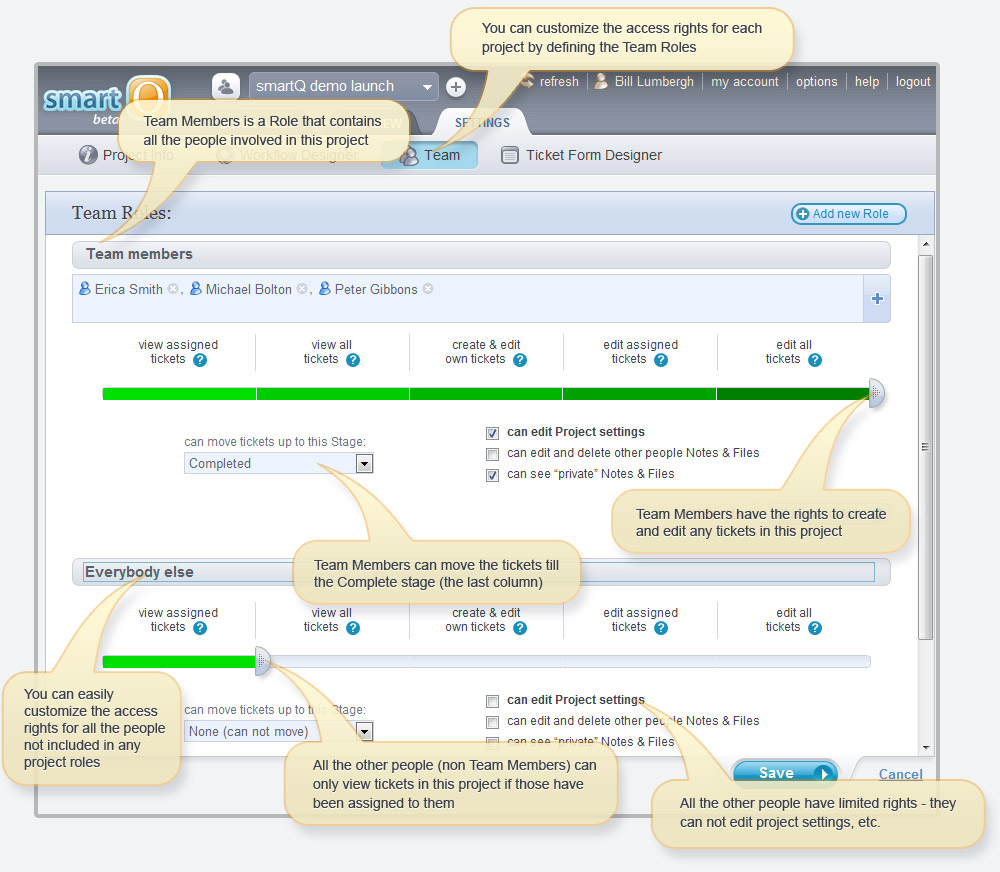
Second, we define the project Roles. In this case we kept it simple - there is just one role, called Team members. All people participating in this project were added to it and this role has all the rights, like adding and editing any tickets and moving them all the way till the "Completed" stage.
The special role "Everybody Else" is here to define the rights of all other people. In this case we give them the rights to see the tickets that have been assigned to them. If we would drag the slider to the left, eliminating this right, those people would not be able to see any tickets in this project, and the Project itself would be hidden from them.
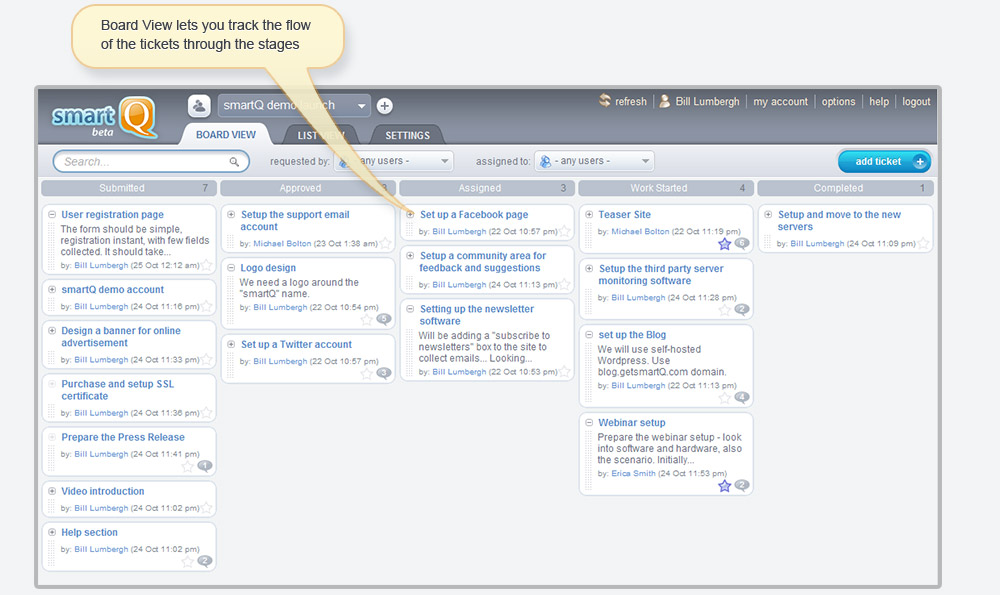
Now we can manage out tickets in the Board View by adding them to the "Submitted" column and then moving the tickets all the way till the "Completed" stage. The "Completed" tickets can be manually archived, or will be auto-archived after some time (set through the "options" menu on the top) to clean the Board View.
smartQ can be used not only for projects limited in time, but also for ongoing projects that don't close - like managing the online Help Desk in your company. The IT department could use smartQ to manage the technical support inside the company, for example.
You can check this demo project here: https://demo.smartqweb.com/#board/67.